> ## Documentation Index
> Fetch the complete documentation index at: https://fillout-005a867b-dependabot-npm-and-yarn-form-data-4-0-6.mintlify.site/llms.txt
> Use this file to discover all available pages before exploring further.
# Track form submissions with Meta Pixels
> Add a Facebook pixel to track when users open your form, transition to new pages and submit responses.
## What is a Meta Pixel?
A [**Meta Pixel**](https://www.facebook.com/business/help/742478679120153?id=1205376682832142) lets you track user behavior, like when a user opens a webpage. You can add tracking pixels on Facebook business accounts, and then use them in your Fillout forms!
This feature is available on **Business**, and **Enterprise** plans. Learn more about our pricing plans and advanced features [**here**](https://www.fillout.com/pricing).
## How to use pixels in your form
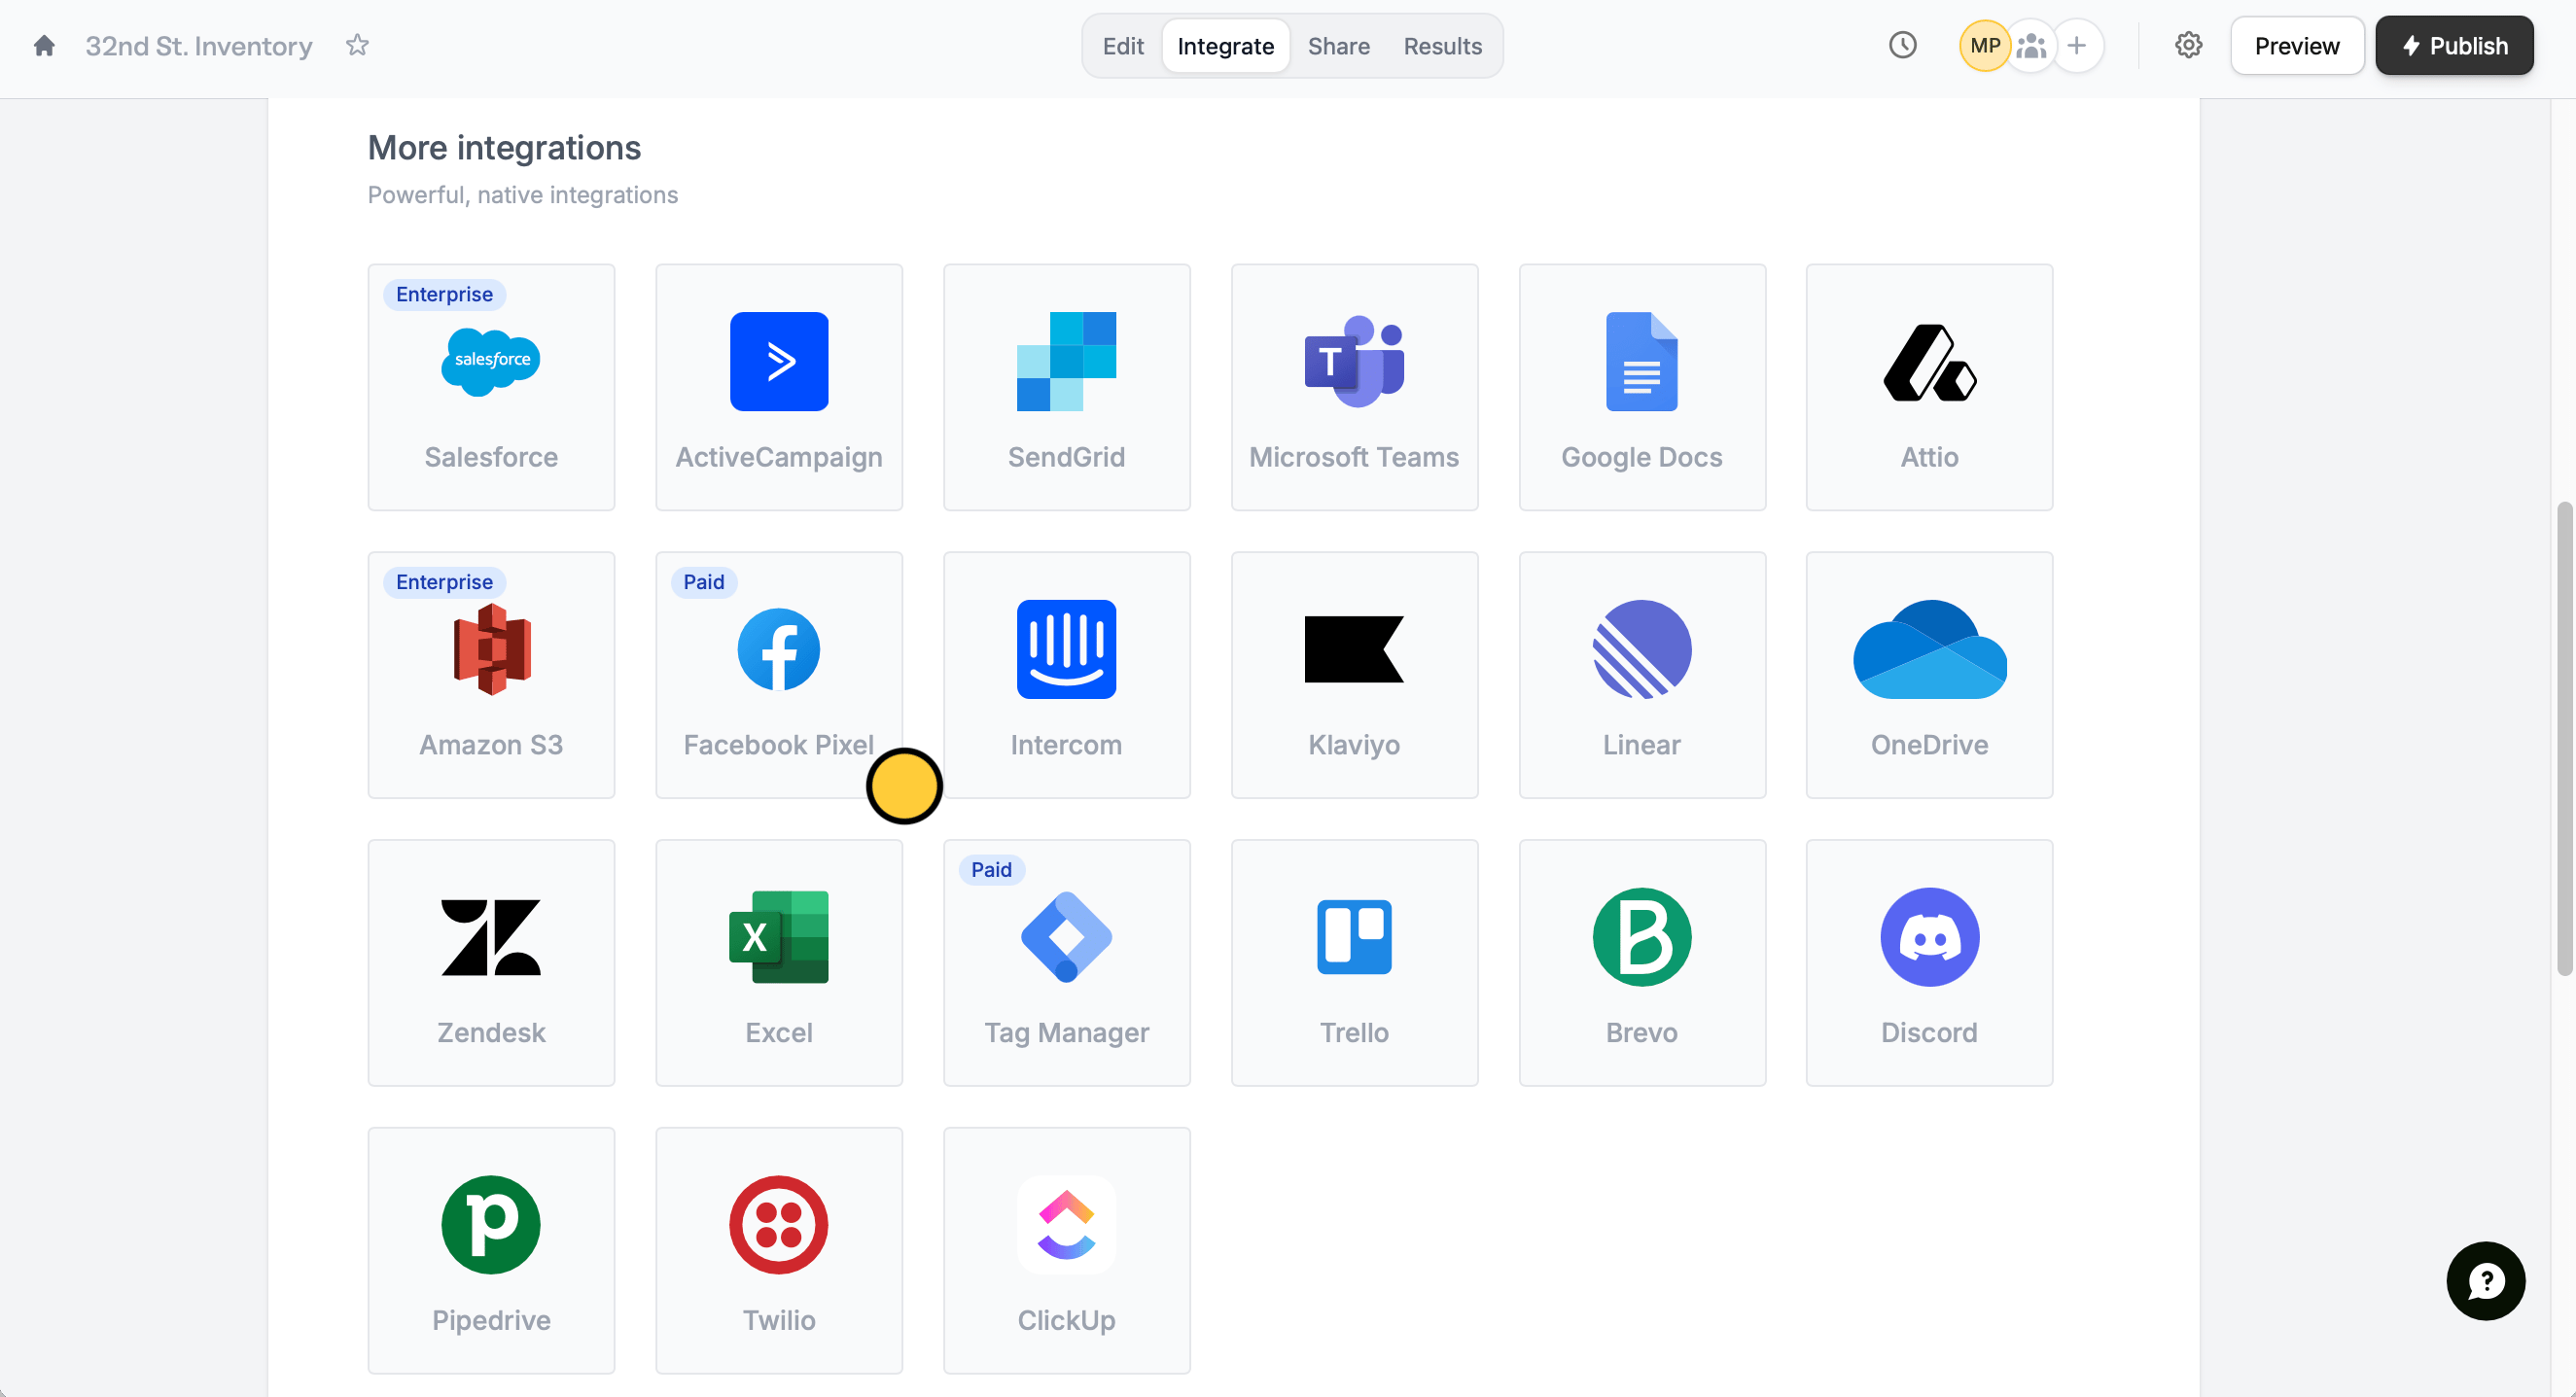
Head over to `Integrate`, and click `Facebook Pixel`.
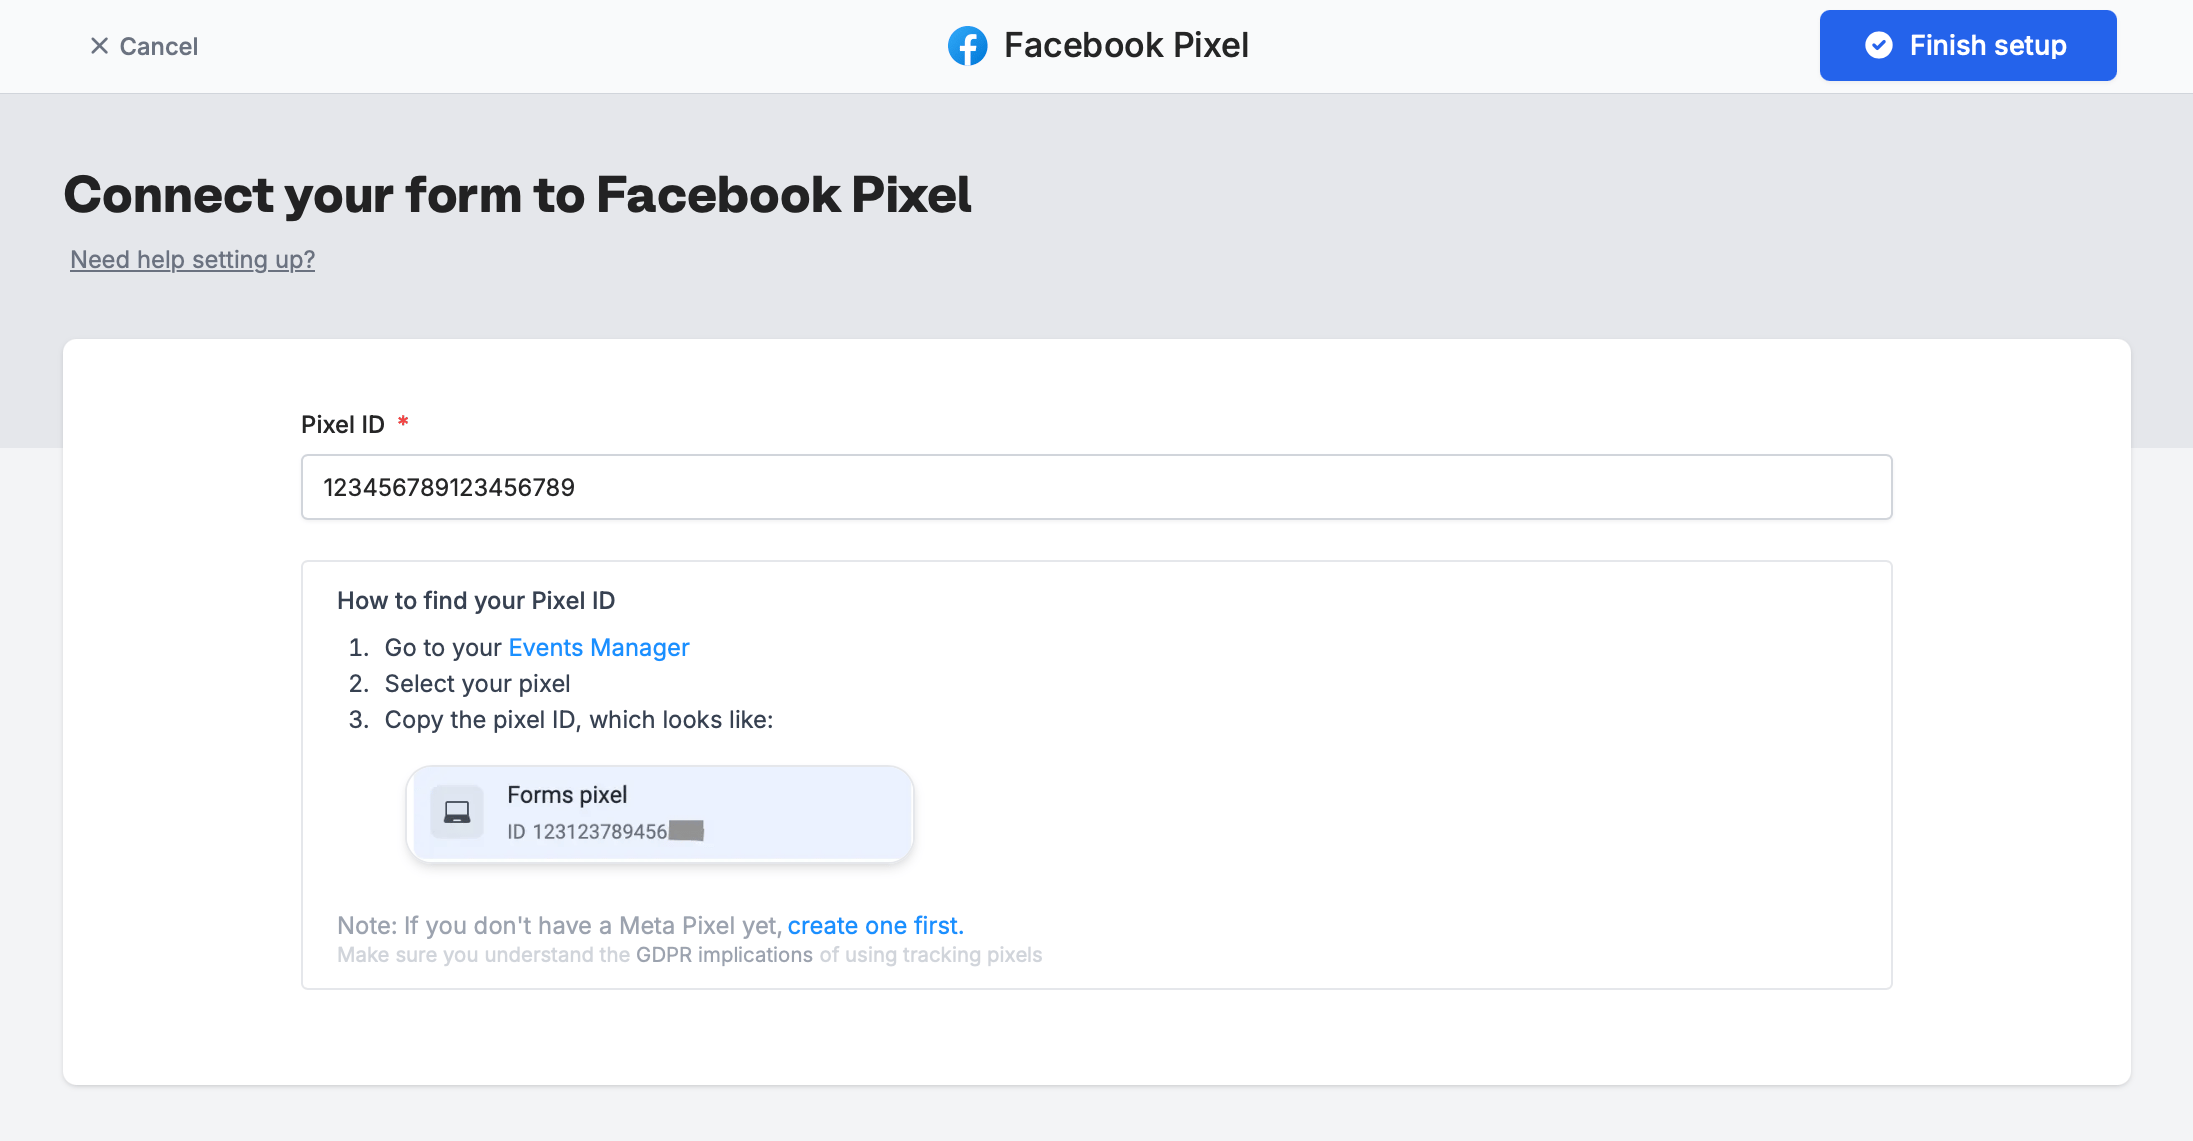
 Input your **Pixel ID**. Follow the instructions below to find your ID. Then, click `Finish setup`.
 That's it! Click `Publish` in the upper right corner.
When someone submits your form with your public form link, you will get events in your Events Manager, which look like the image below.
## How to check event details
On Meta Business Suite, if you click on one of the generated **Fillout events** (**Fillout.FormPageViewed** or **Fillout.FormSubmitted**) you will be able to `View details`.
That's it! Click `Publish` in the upper right corner.
When someone submits your form with your public form link, you will get events in your Events Manager, which look like the image below.
## How to check event details
On Meta Business Suite, if you click on one of the generated **Fillout events** (**Fillout.FormPageViewed** or **Fillout.FormSubmitted**) you will be able to `View details`.
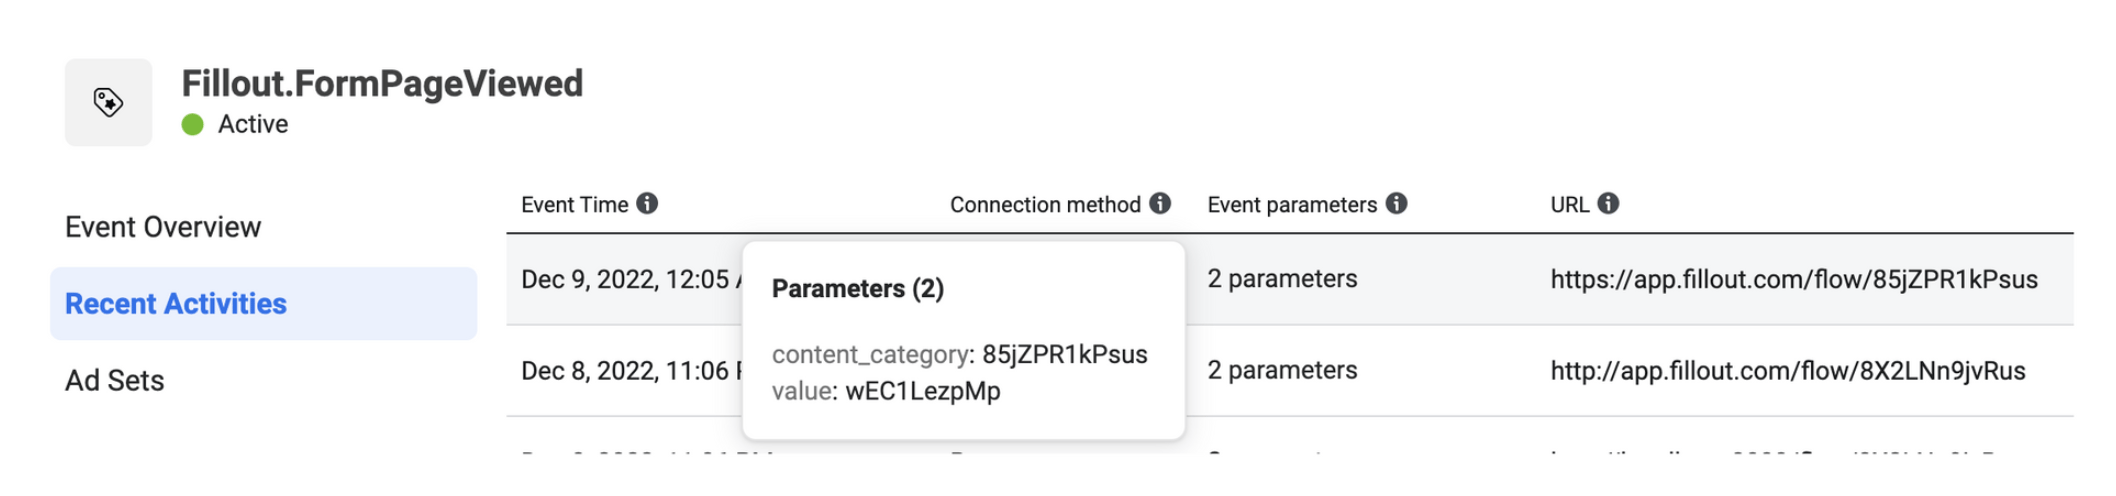 In **Recent Activities**, you can see parameters that were passed to the pixel.
* **content\_category** - the form's unique ID
* **value** - the page ID that the user saw found at the end of the URL (e.g., [https://app.fillout.com/editor/85jZPR1kPsus/edit/85jZPR1kPsus](https://app.fillout.com/editor/85jZPR1kPsus/edit/85jZPR1kPsus))
It can take up between 2 to 5 minutes for new events to show up in your Events Manager.
If you need to be GDPR compliant, you will want to [display a cookie banner](https://www.fillout.com/help/cookie-consent) on the form, which can be toggled in the form settings.
## Other similar integrations
Use email, GCLID, address, and more.
Check conversions and ROI through responses.
In **Recent Activities**, you can see parameters that were passed to the pixel.
* **content\_category** - the form's unique ID
* **value** - the page ID that the user saw found at the end of the URL (e.g., [https://app.fillout.com/editor/85jZPR1kPsus/edit/85jZPR1kPsus](https://app.fillout.com/editor/85jZPR1kPsus/edit/85jZPR1kPsus))
It can take up between 2 to 5 minutes for new events to show up in your Events Manager.
If you need to be GDPR compliant, you will want to [display a cookie banner](https://www.fillout.com/help/cookie-consent) on the form, which can be toggled in the form settings.
## Other similar integrations
Use email, GCLID, address, and more.
Check conversions and ROI through responses.