> ## Documentation Index
> Fetch the complete documentation index at: https://fillout-005a867b-dependabot-npm-and-yarn-form-data-4-0-6.mintlify.site/llms.txt
> Use this file to discover all available pages before exploring further.
# Date
> Collect a single date, data and time, or date range from your respondents. This is useful for bookings, events, and availability tracking.
## Date fields vs Scheduling page
**Date fields** (Date picker, Date time picker, and Date range) collect a date input. Common use cases include:
* Asking a repondent's date of birth
* Collecting project deadlines
* Gathering travel or vacation dates
* Tracking project start and end dates
* [Collecting multiple availabilities](https://www.fillout.com/help/date-range#collect-multiple-availabilities)
On the other hand, **Scheduling pages** reserve available time slots on an individual's calendar (Google or Outlook calendar).
| Date Fields | Scheduling Page |
| ----------------------------- | -------------------------------------- |
| Collects a date or time input | Books a real calendar slot |
| No calendar integration | Connects to Google or Outlook Calendar |
| No availability checking | Shows live availability |
| No automatic booking | Automatically creates calendar event |
| Best for general forms | Best for appointments & meetings |
This article is about date fields. To know more about scheduling pages, check out [this guide](https://www.fillout.com/help/scheduling-page).
## How to add a date fields
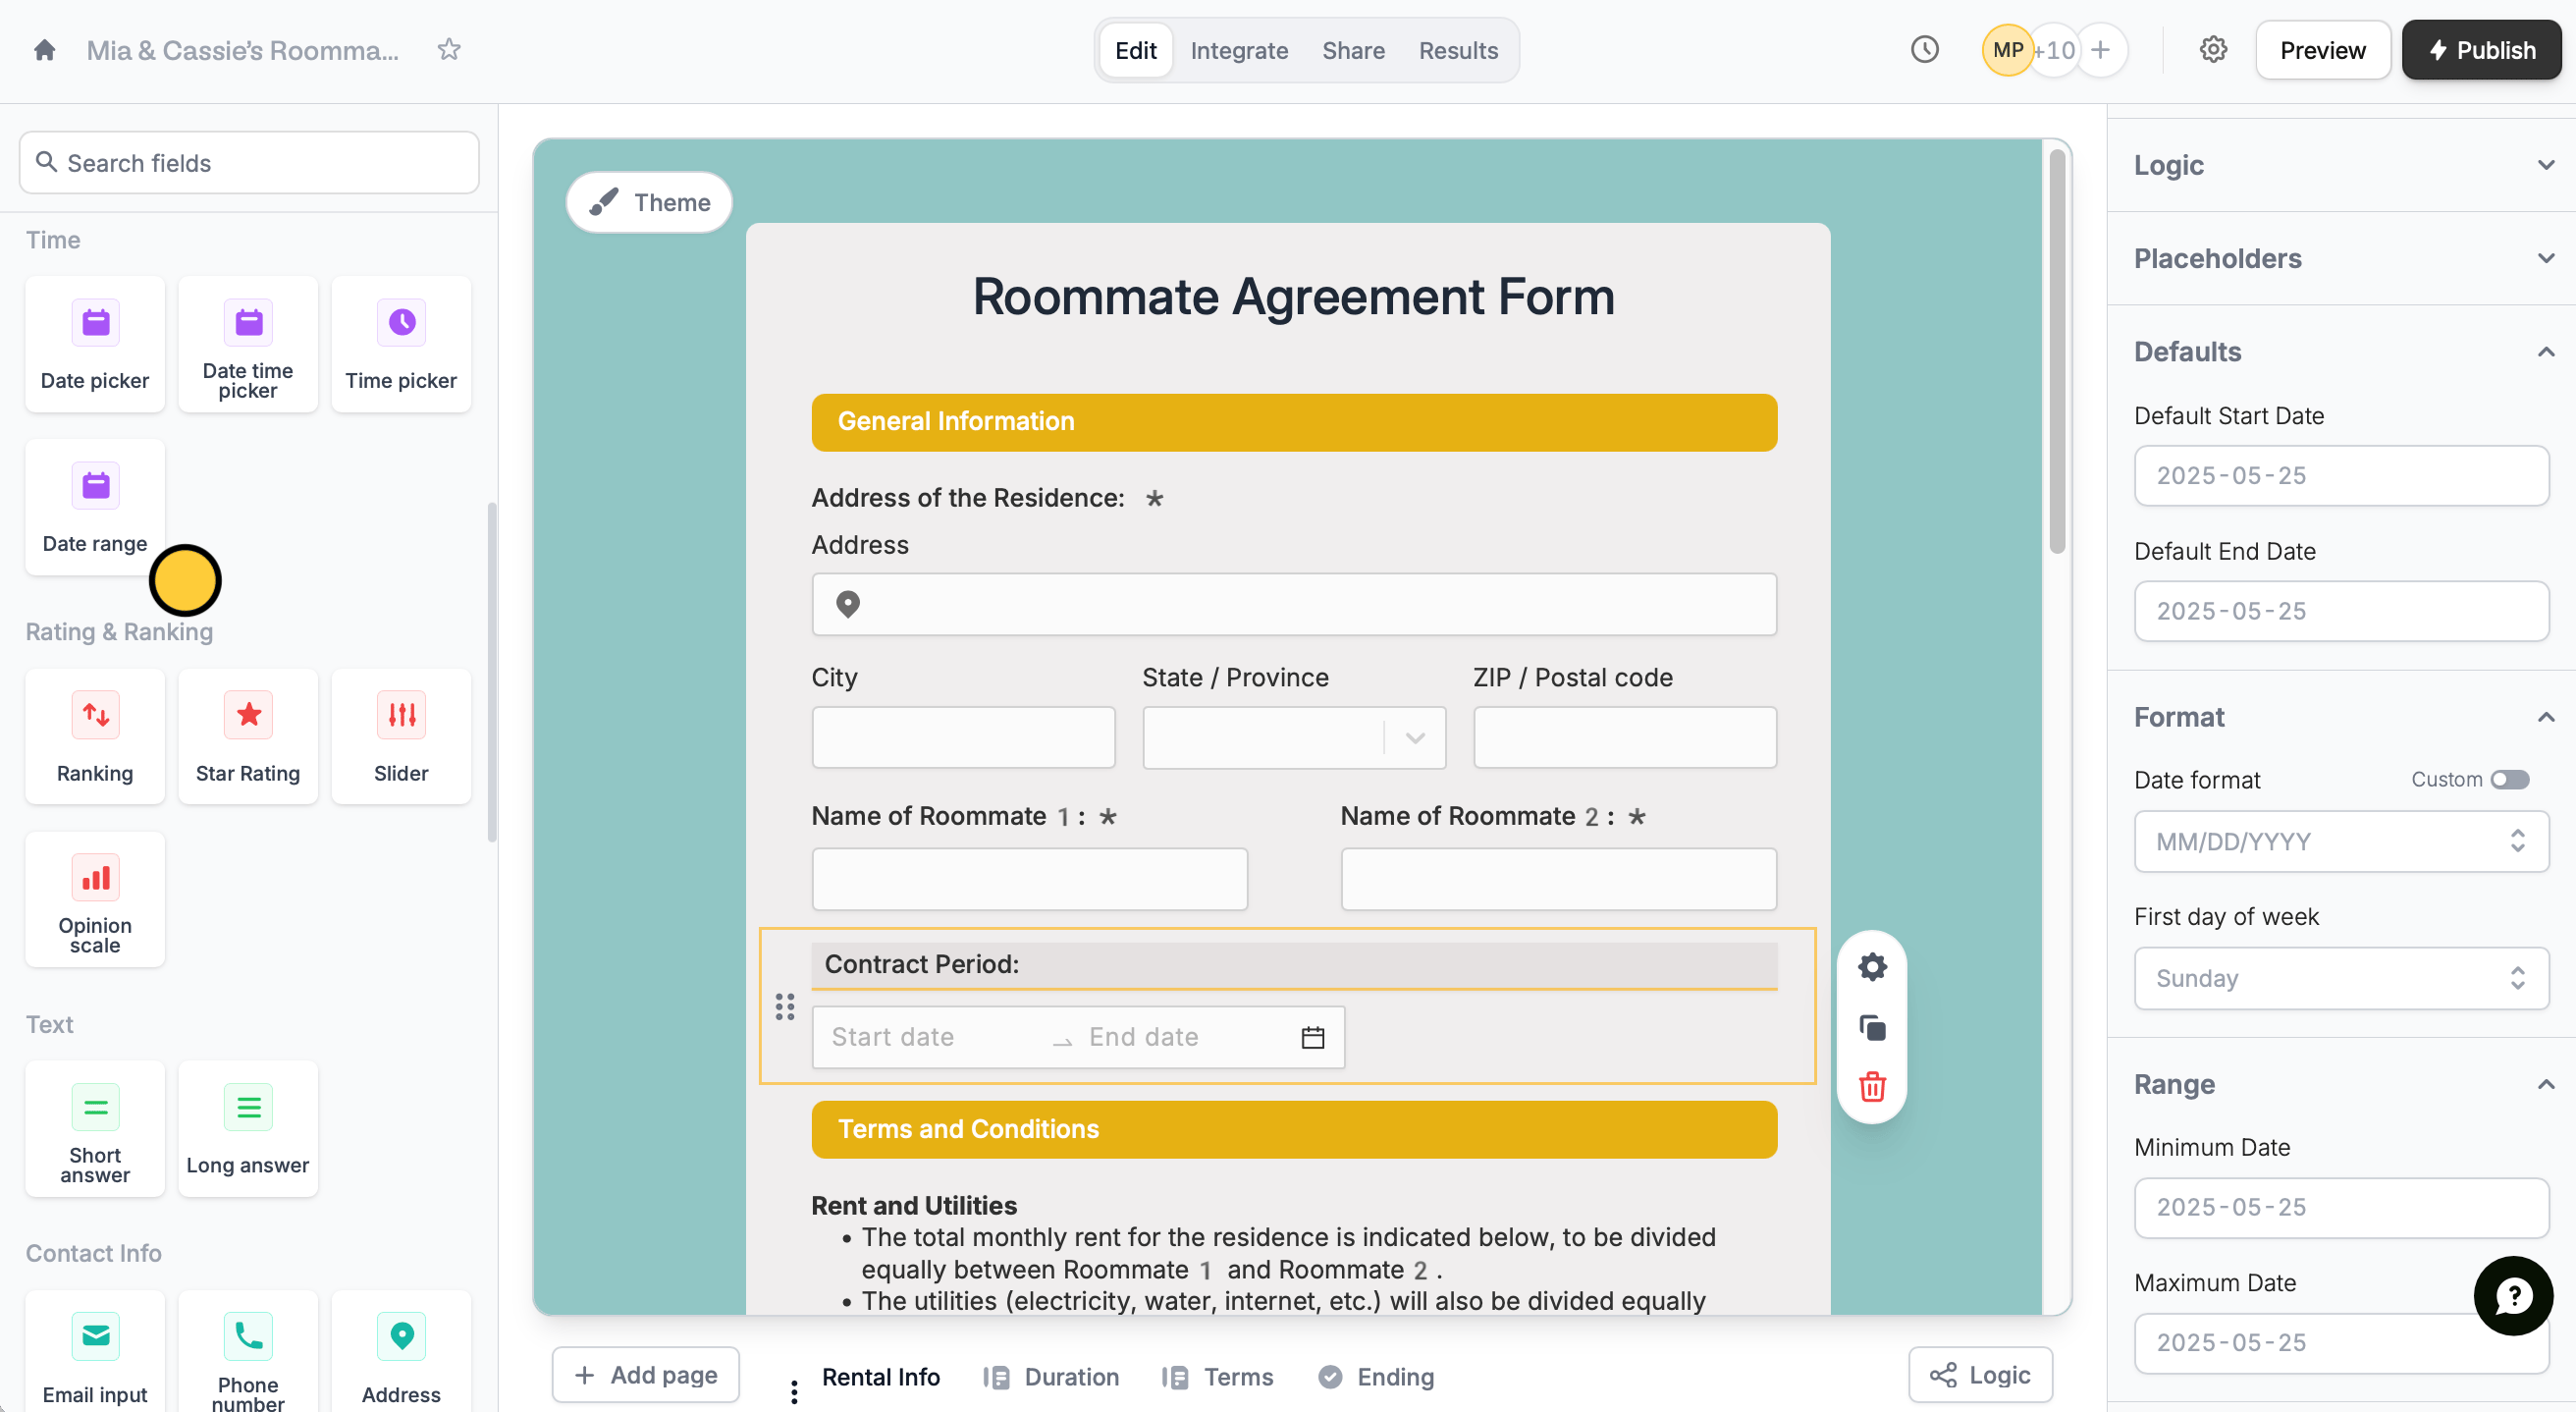
In the left-hand panel of your form, drag and drop your chosen **date field**. You can pick between:
* **Date picker** - collects a single date
* **Date time picker** - collects a date and time
* **Date range** - lets respondents select start and end dates in your forms
In our example, we'll select `Date range`.
 ## Change date format and settings
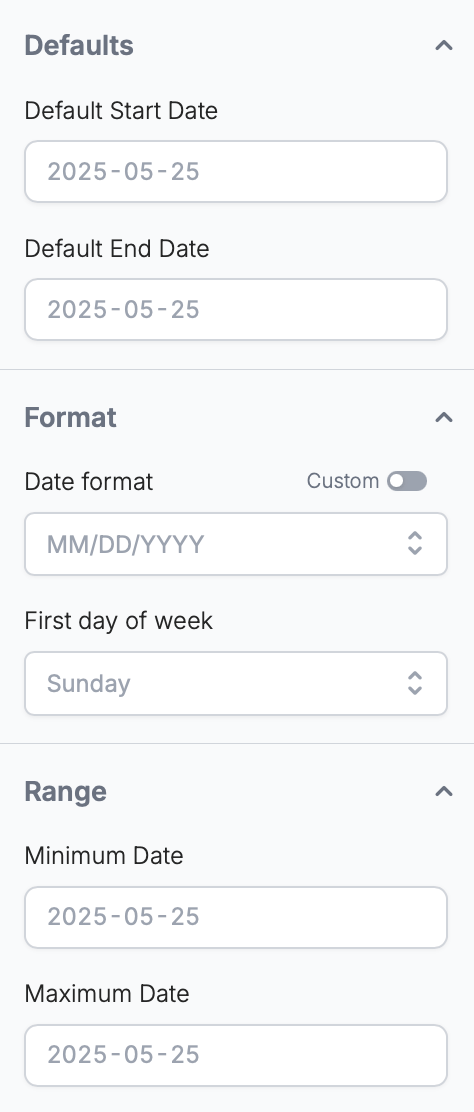
To configure your field settings, click . In the right-hand panel, you can:
* Set a default start and end date
* Change the date format and first day of the week
* Add a minimum and maximum range respondents can choose from
## Change date format and settings
To configure your field settings, click . In the right-hand panel, you can:
* Set a default start and end date
* Change the date format and first day of the week
* Add a minimum and maximum range respondents can choose from
 ## Collect multiple availabilities
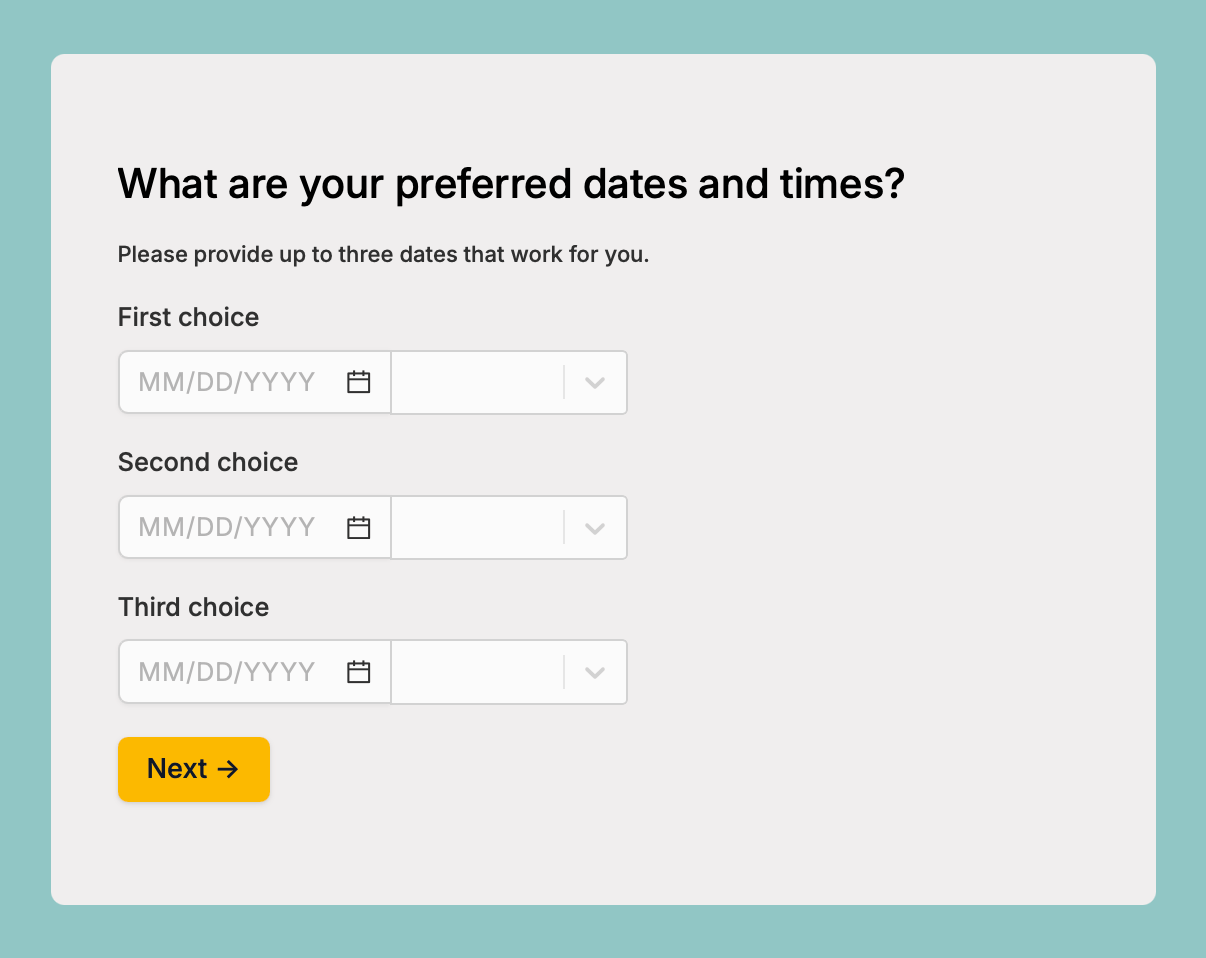
To gather several preferred dates and times from respondents, add multiple `date fields` to your form.
## Collect multiple availabilities
To gather several preferred dates and times from respondents, add multiple `date fields` to your form.
 ## Mapping to Airtable, Notion and other databases
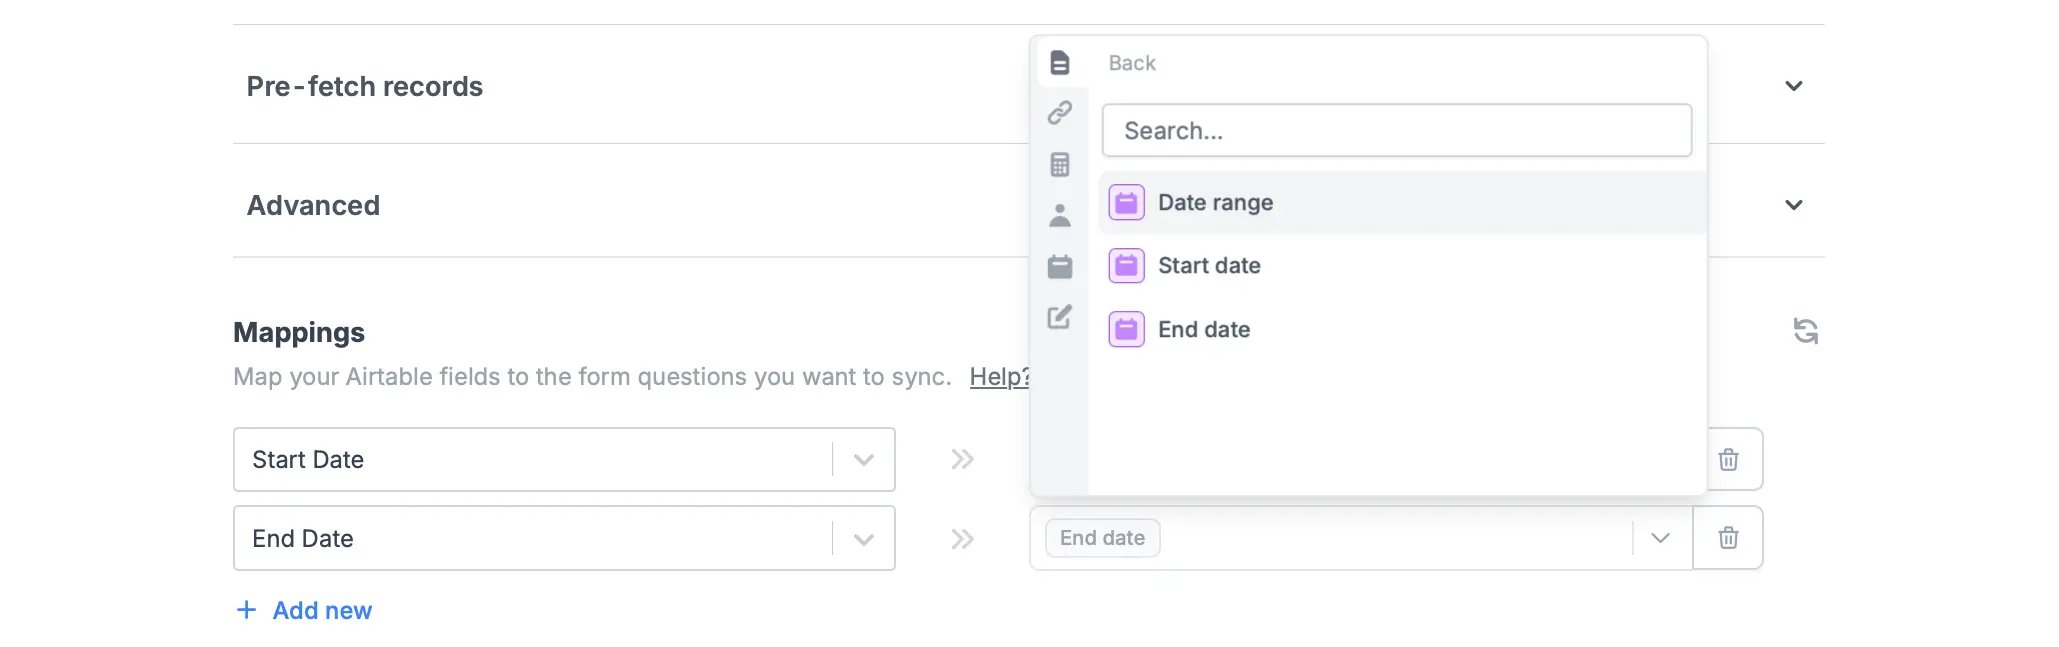
Click `Integrate` in top menu and choose Airtable, Notion or another [database](/integrations).
Click `Edit` in the top menu. In the left-hand panel under **Other**, click your `Date field`.
Go back to the `Integrate` page. Under **Mappings**, choose the fields you want to save the start and end dates to. Reference your integration fields from the left to Fillout form fields in the right.
## Mapping to Airtable, Notion and other databases
Click `Integrate` in top menu and choose Airtable, Notion or another [database](/integrations).
Click `Edit` in the top menu. In the left-hand panel under **Other**, click your `Date field`.
Go back to the `Integrate` page. Under **Mappings**, choose the fields you want to save the start and end dates to. Reference your integration fields from the left to Fillout form fields in the right.
 ## Related article
Set the default value to today, tomorrow, or another date.
Let respondents book a time slot on your calendar.
## Related article
Set the default value to today, tomorrow, or another date.
Let respondents book a time slot on your calendar.