> ## Documentation Index
> Fetch the complete documentation index at: https://fillout-005a867b-dependabot-npm-and-yarn-form-data-4-0-6.mintlify.site/llms.txt
> Use this file to discover all available pages before exploring further.
# Update existing Airtable records with a form
> Make a form that edits existing records from Airtable and pre-fills fields with data from the record.
## Tutorial video
Check out [Gareth](https://www.garethpronovost.com/)’s tutorial on using Fillout to update existing Airtable records.
## How it works
Open your [Airtable-connected form](https://www.fillout.com/help/airtable). Click `Integrate` on the top menu followed by `Airtable`.
Then specify that you want to `Update record`.
You’ll now get a formula that defines a **unique link** for every record in your table.
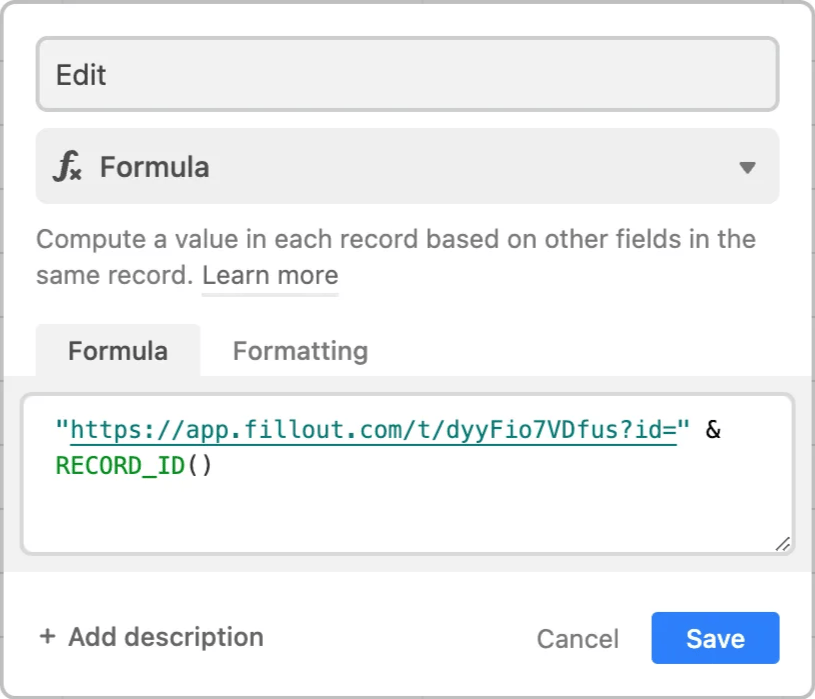
Create a new `formula` field and copy the formula Fillout provides on the `Integrate` page.
That's it! Click `Update` followed by `Publish` in the upper right corner.
To update a record, click `Preview` and select a **Record to update** or click one of the unique links from your Airtable.
Your form is **automatically pre-filled** for whichever record it is updating.
If you don’t provide an **id** in the unique URL, the form will create a new record instead.
## Let respondents choose a record to update
Use [this approach](/choose-record-to-update) if you prefer to let respondents choose (in Fillout) which record they’d like to update.
## Advanced next steps (Optional)
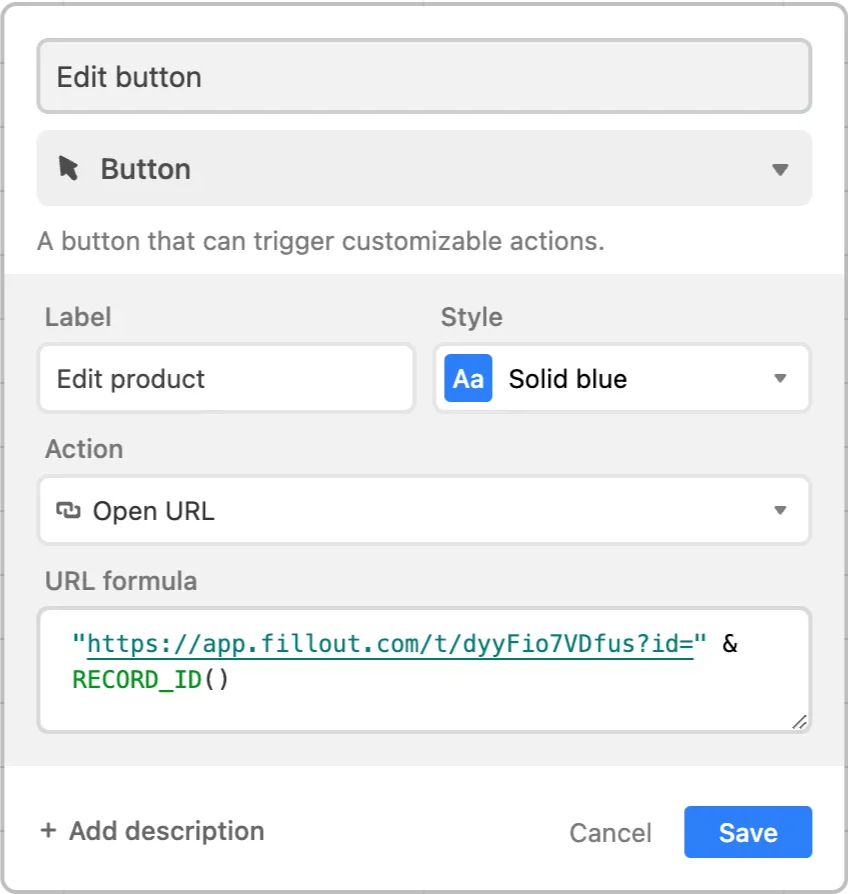
You can use update forms in combination with products like Airtable interfaces, Softr, or Stacker. For example, instead of adding a formula in Step 2 above, we could add a `Button` field.
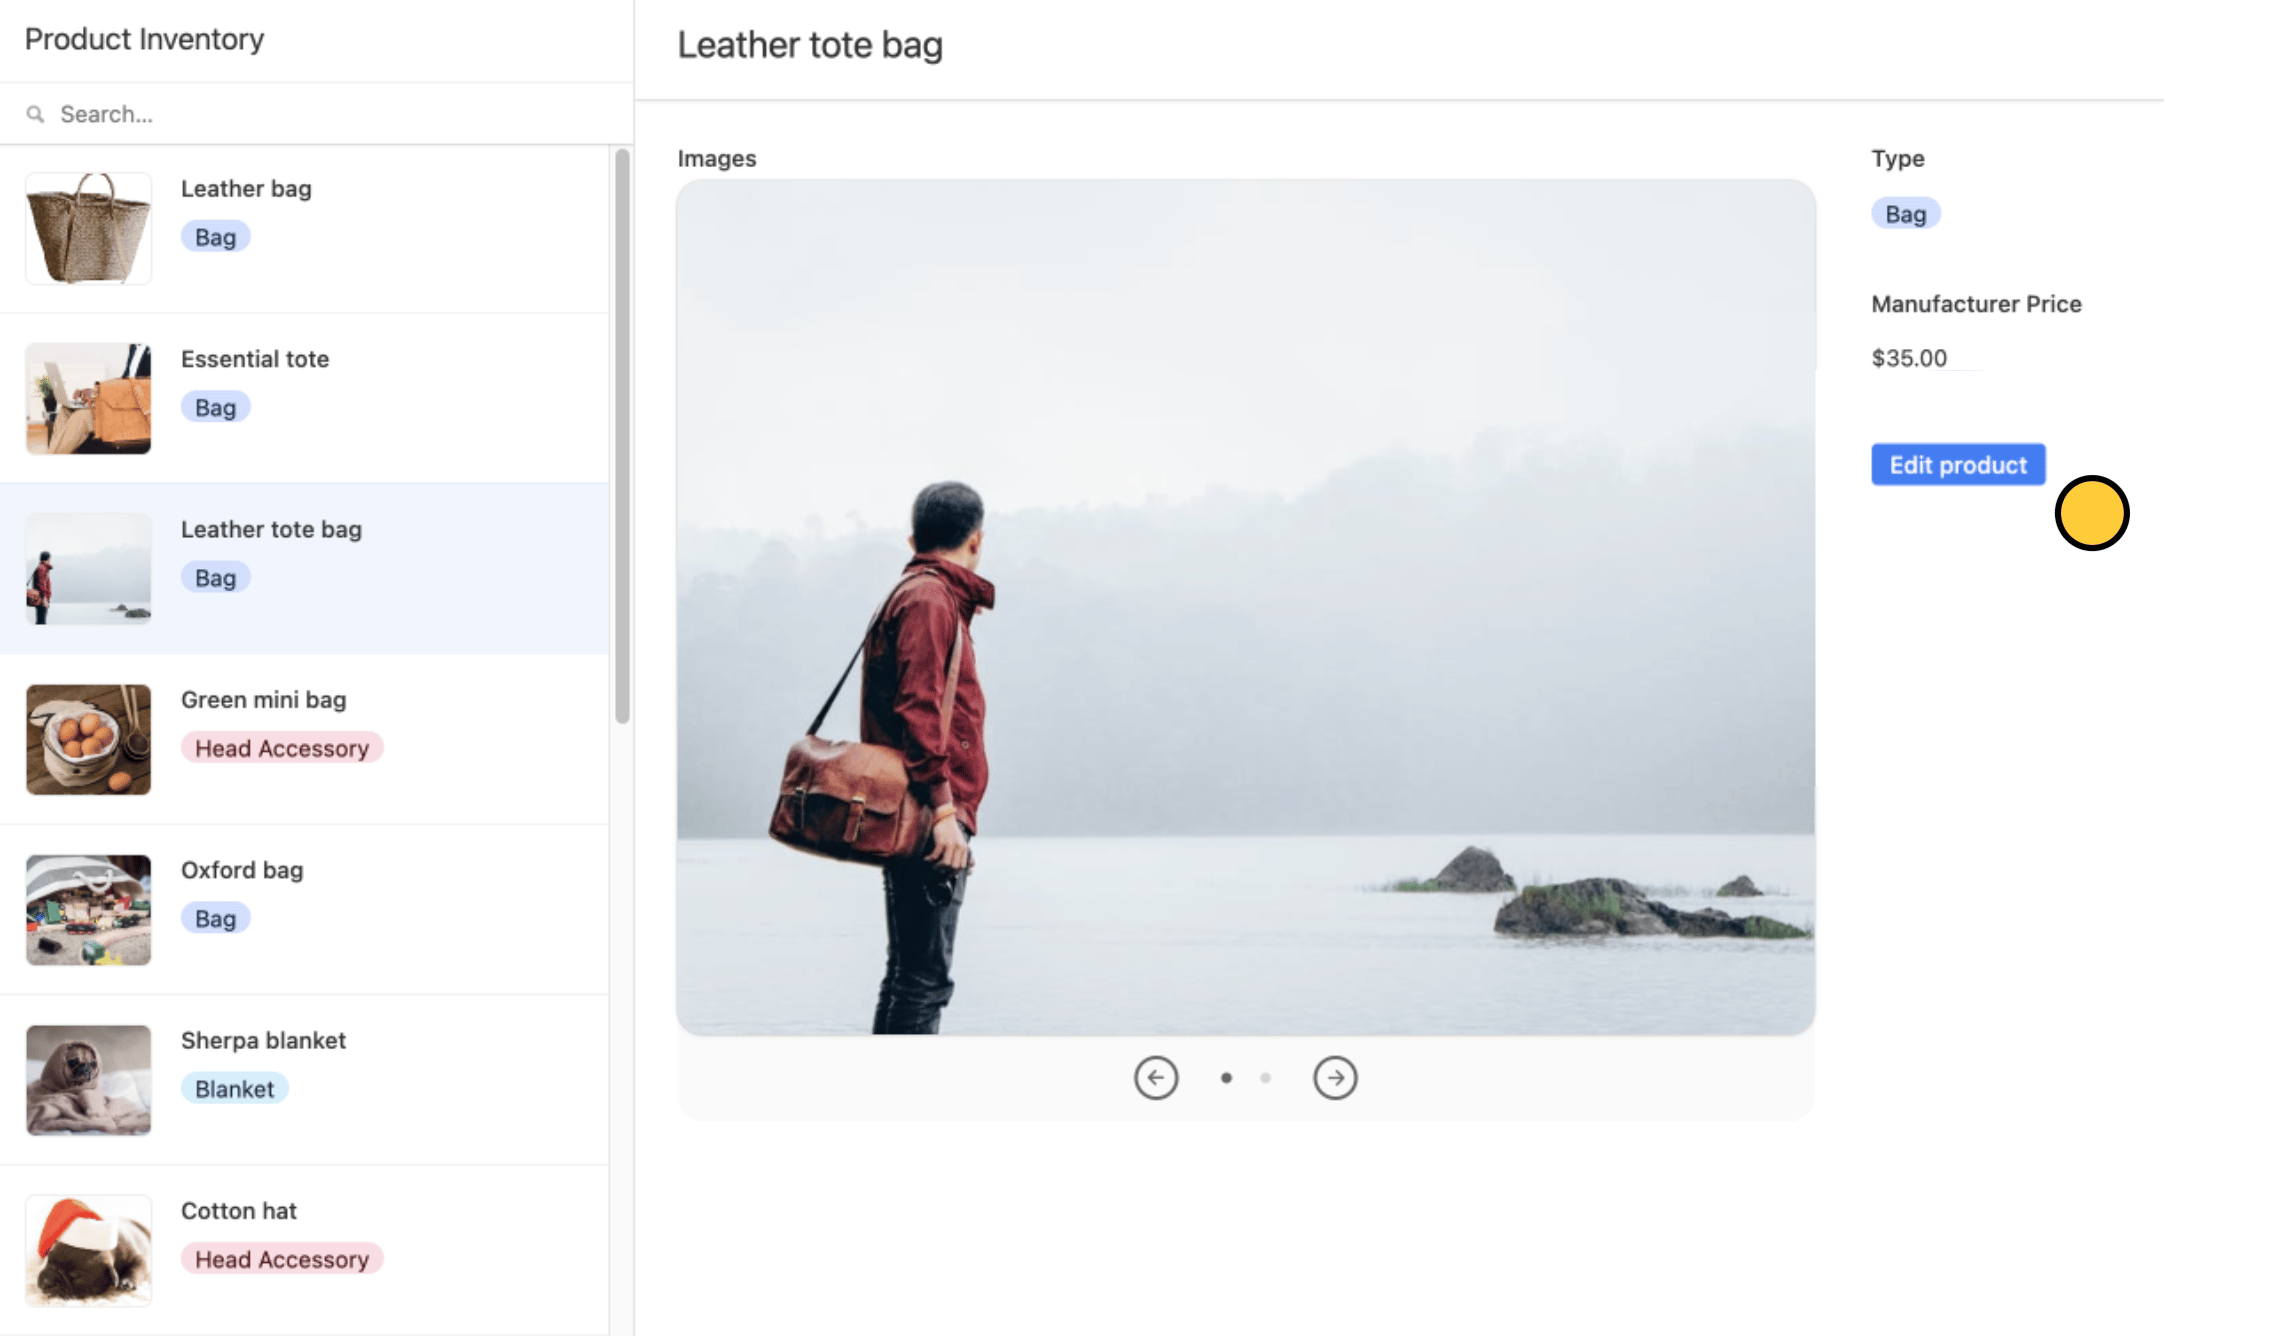
Then, we can display this button in an Airtable interface, for users to easily edit the record.
## Airtable specific guides
Let respondents create records from your form.
Let respondents choose from your form.
Add entries across multiple tables.
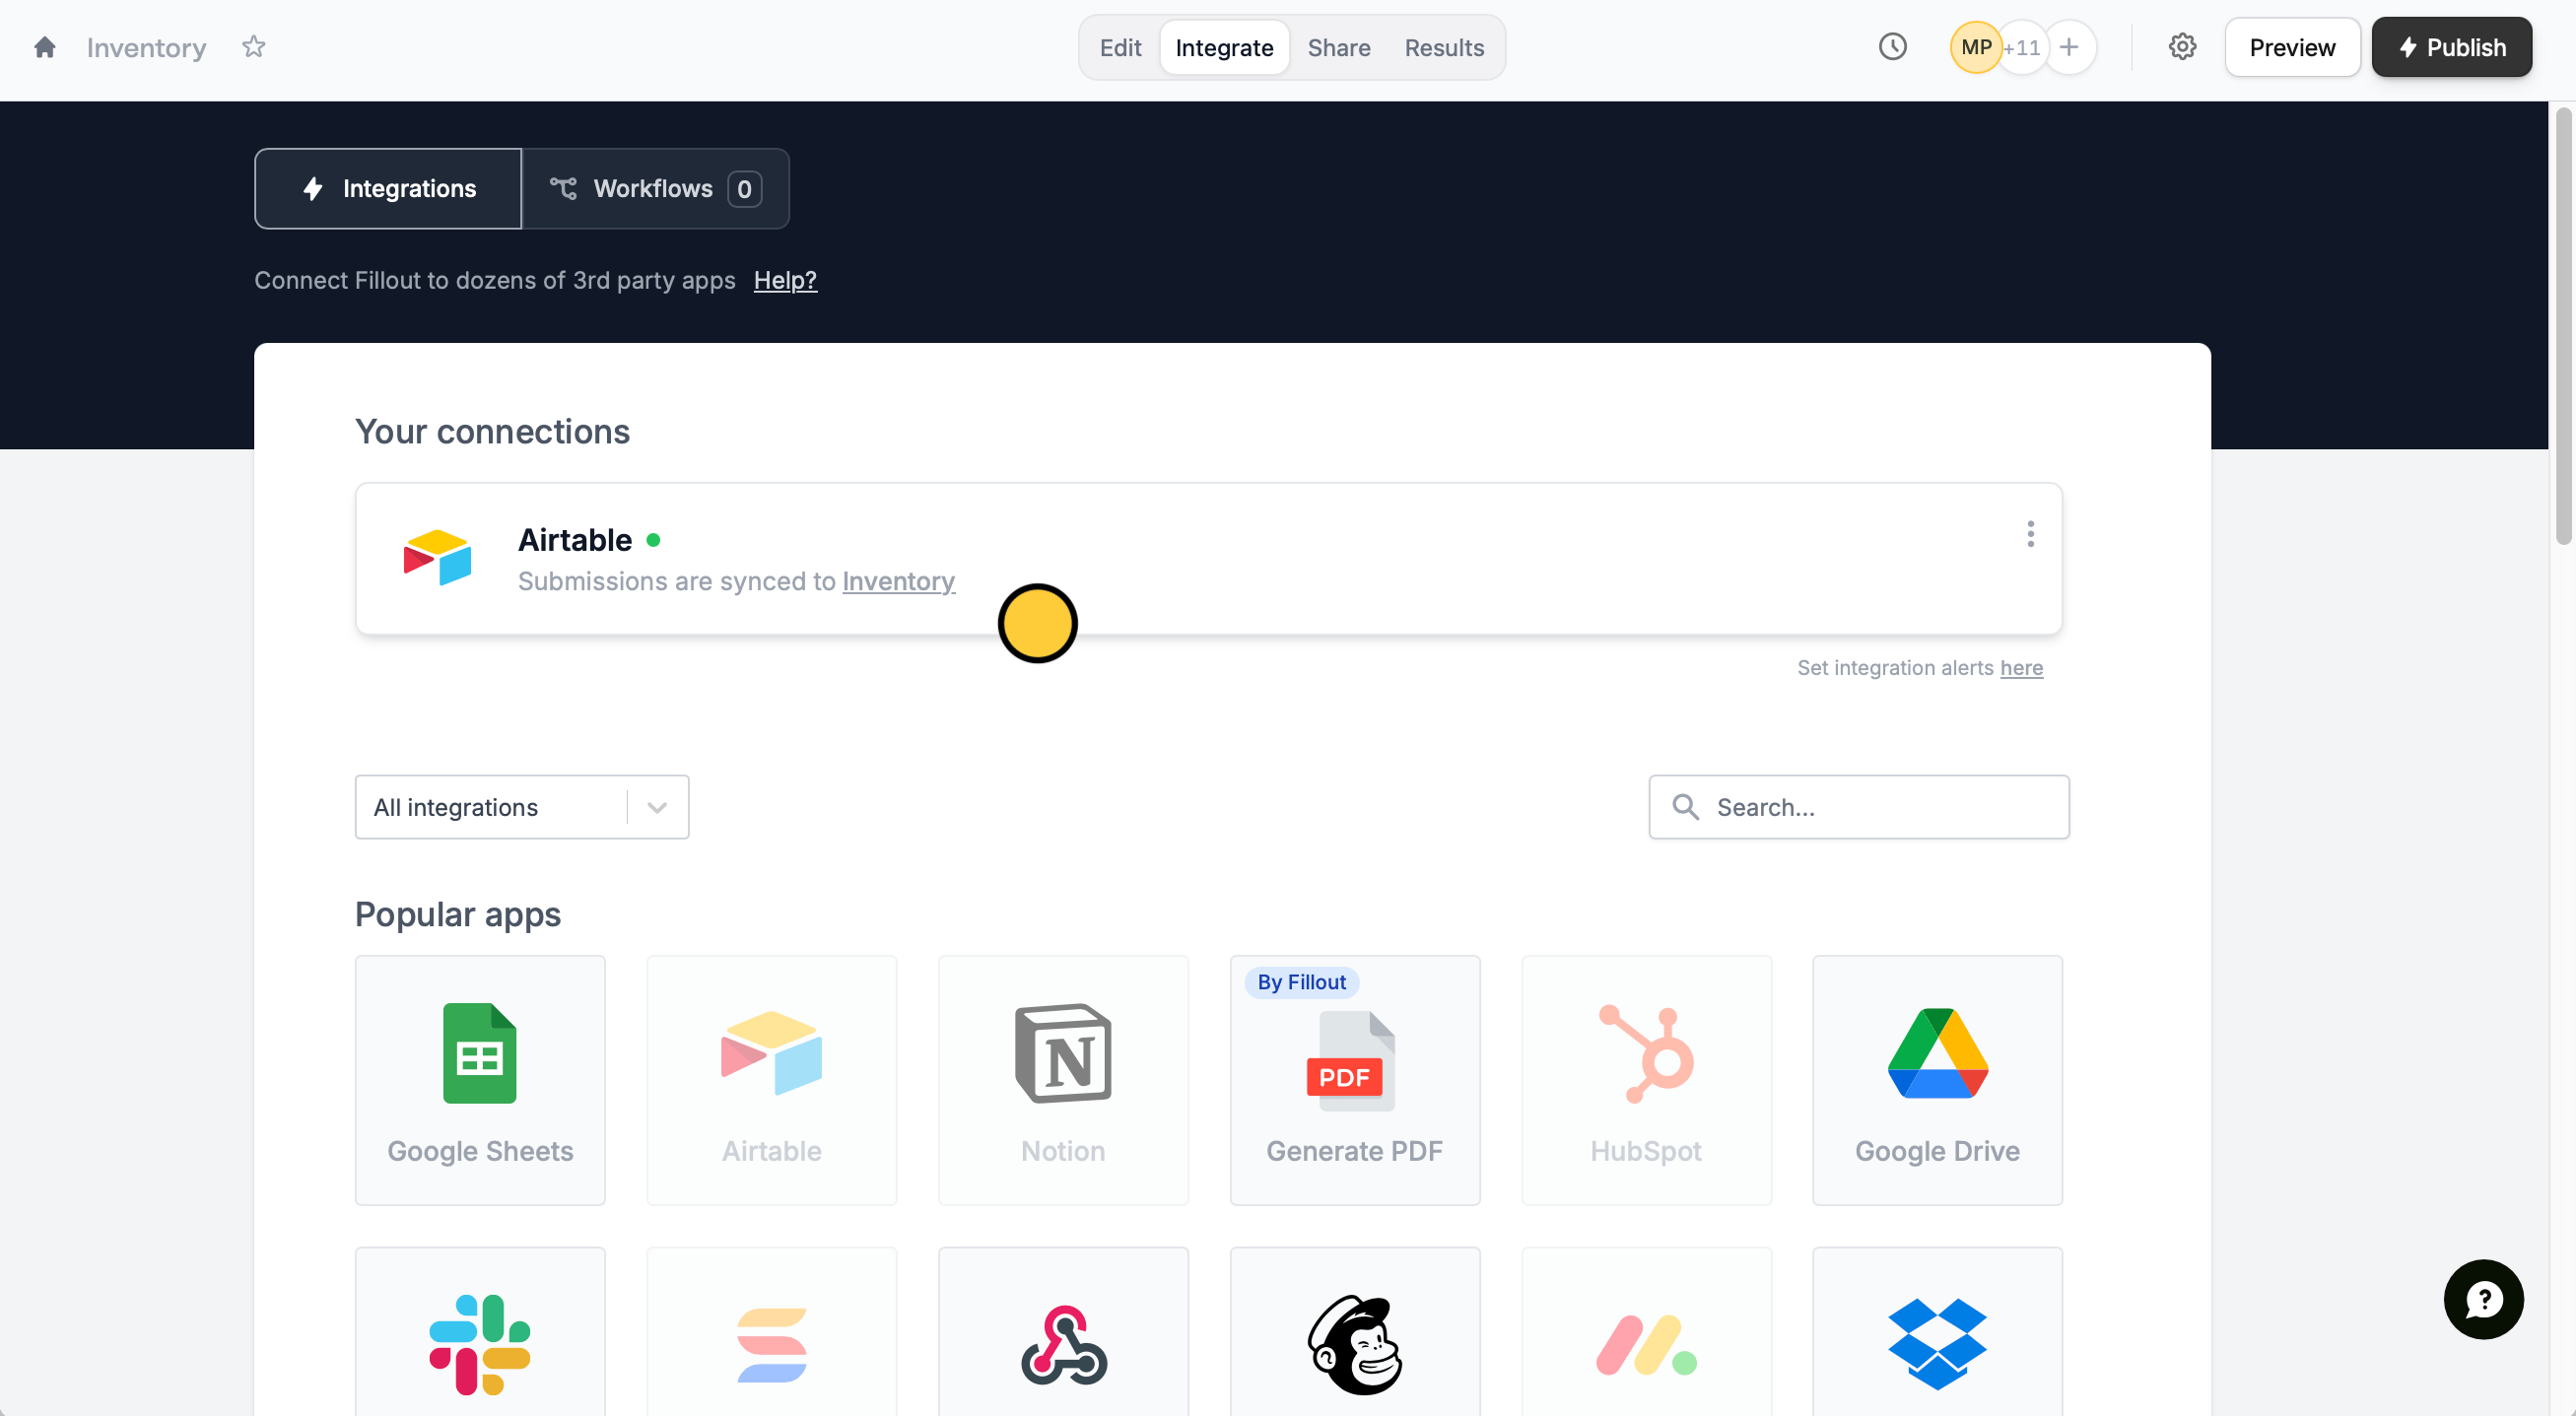 Then specify that you want to `Update record`.
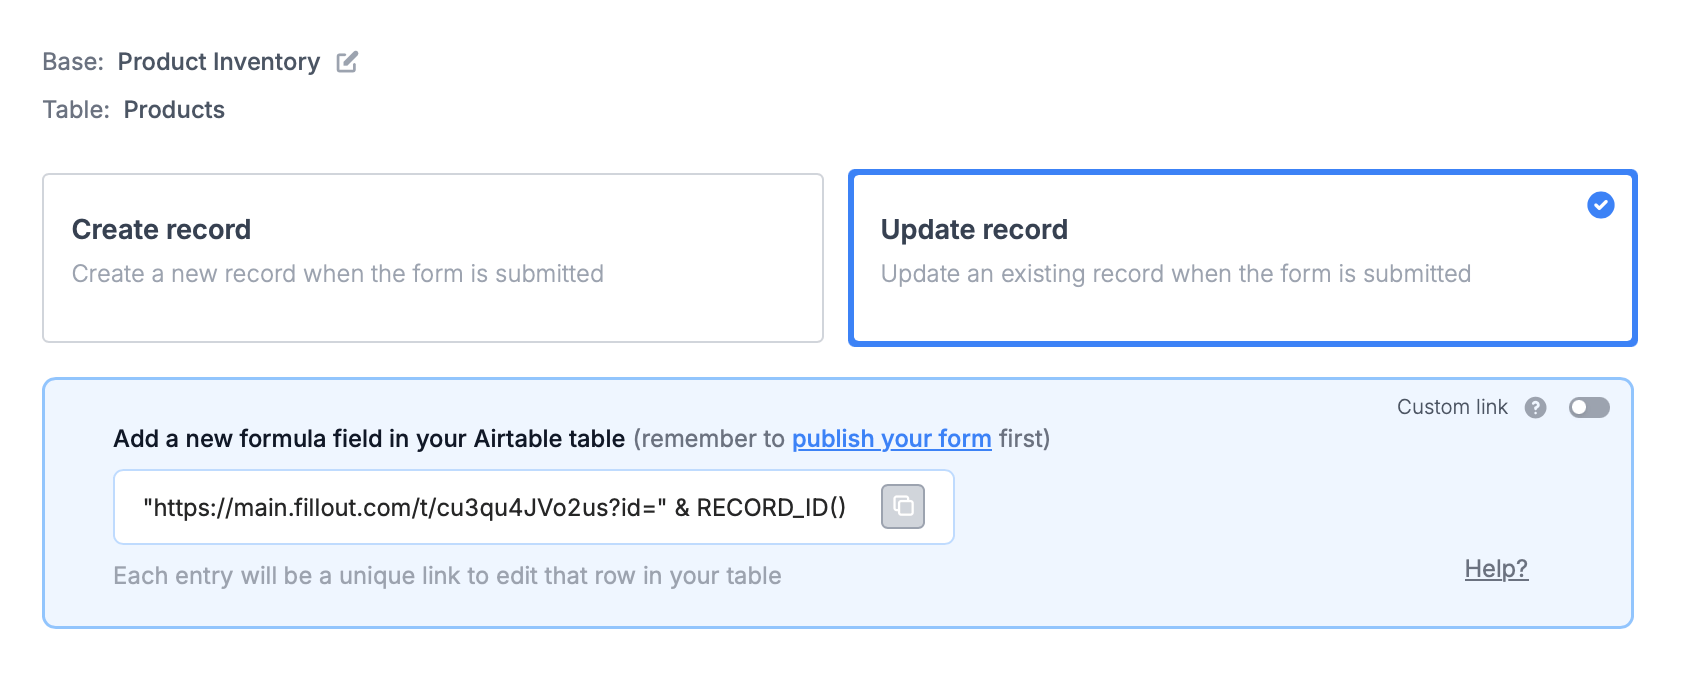 You’ll now get a formula that defines a **unique link** for every record in your table.
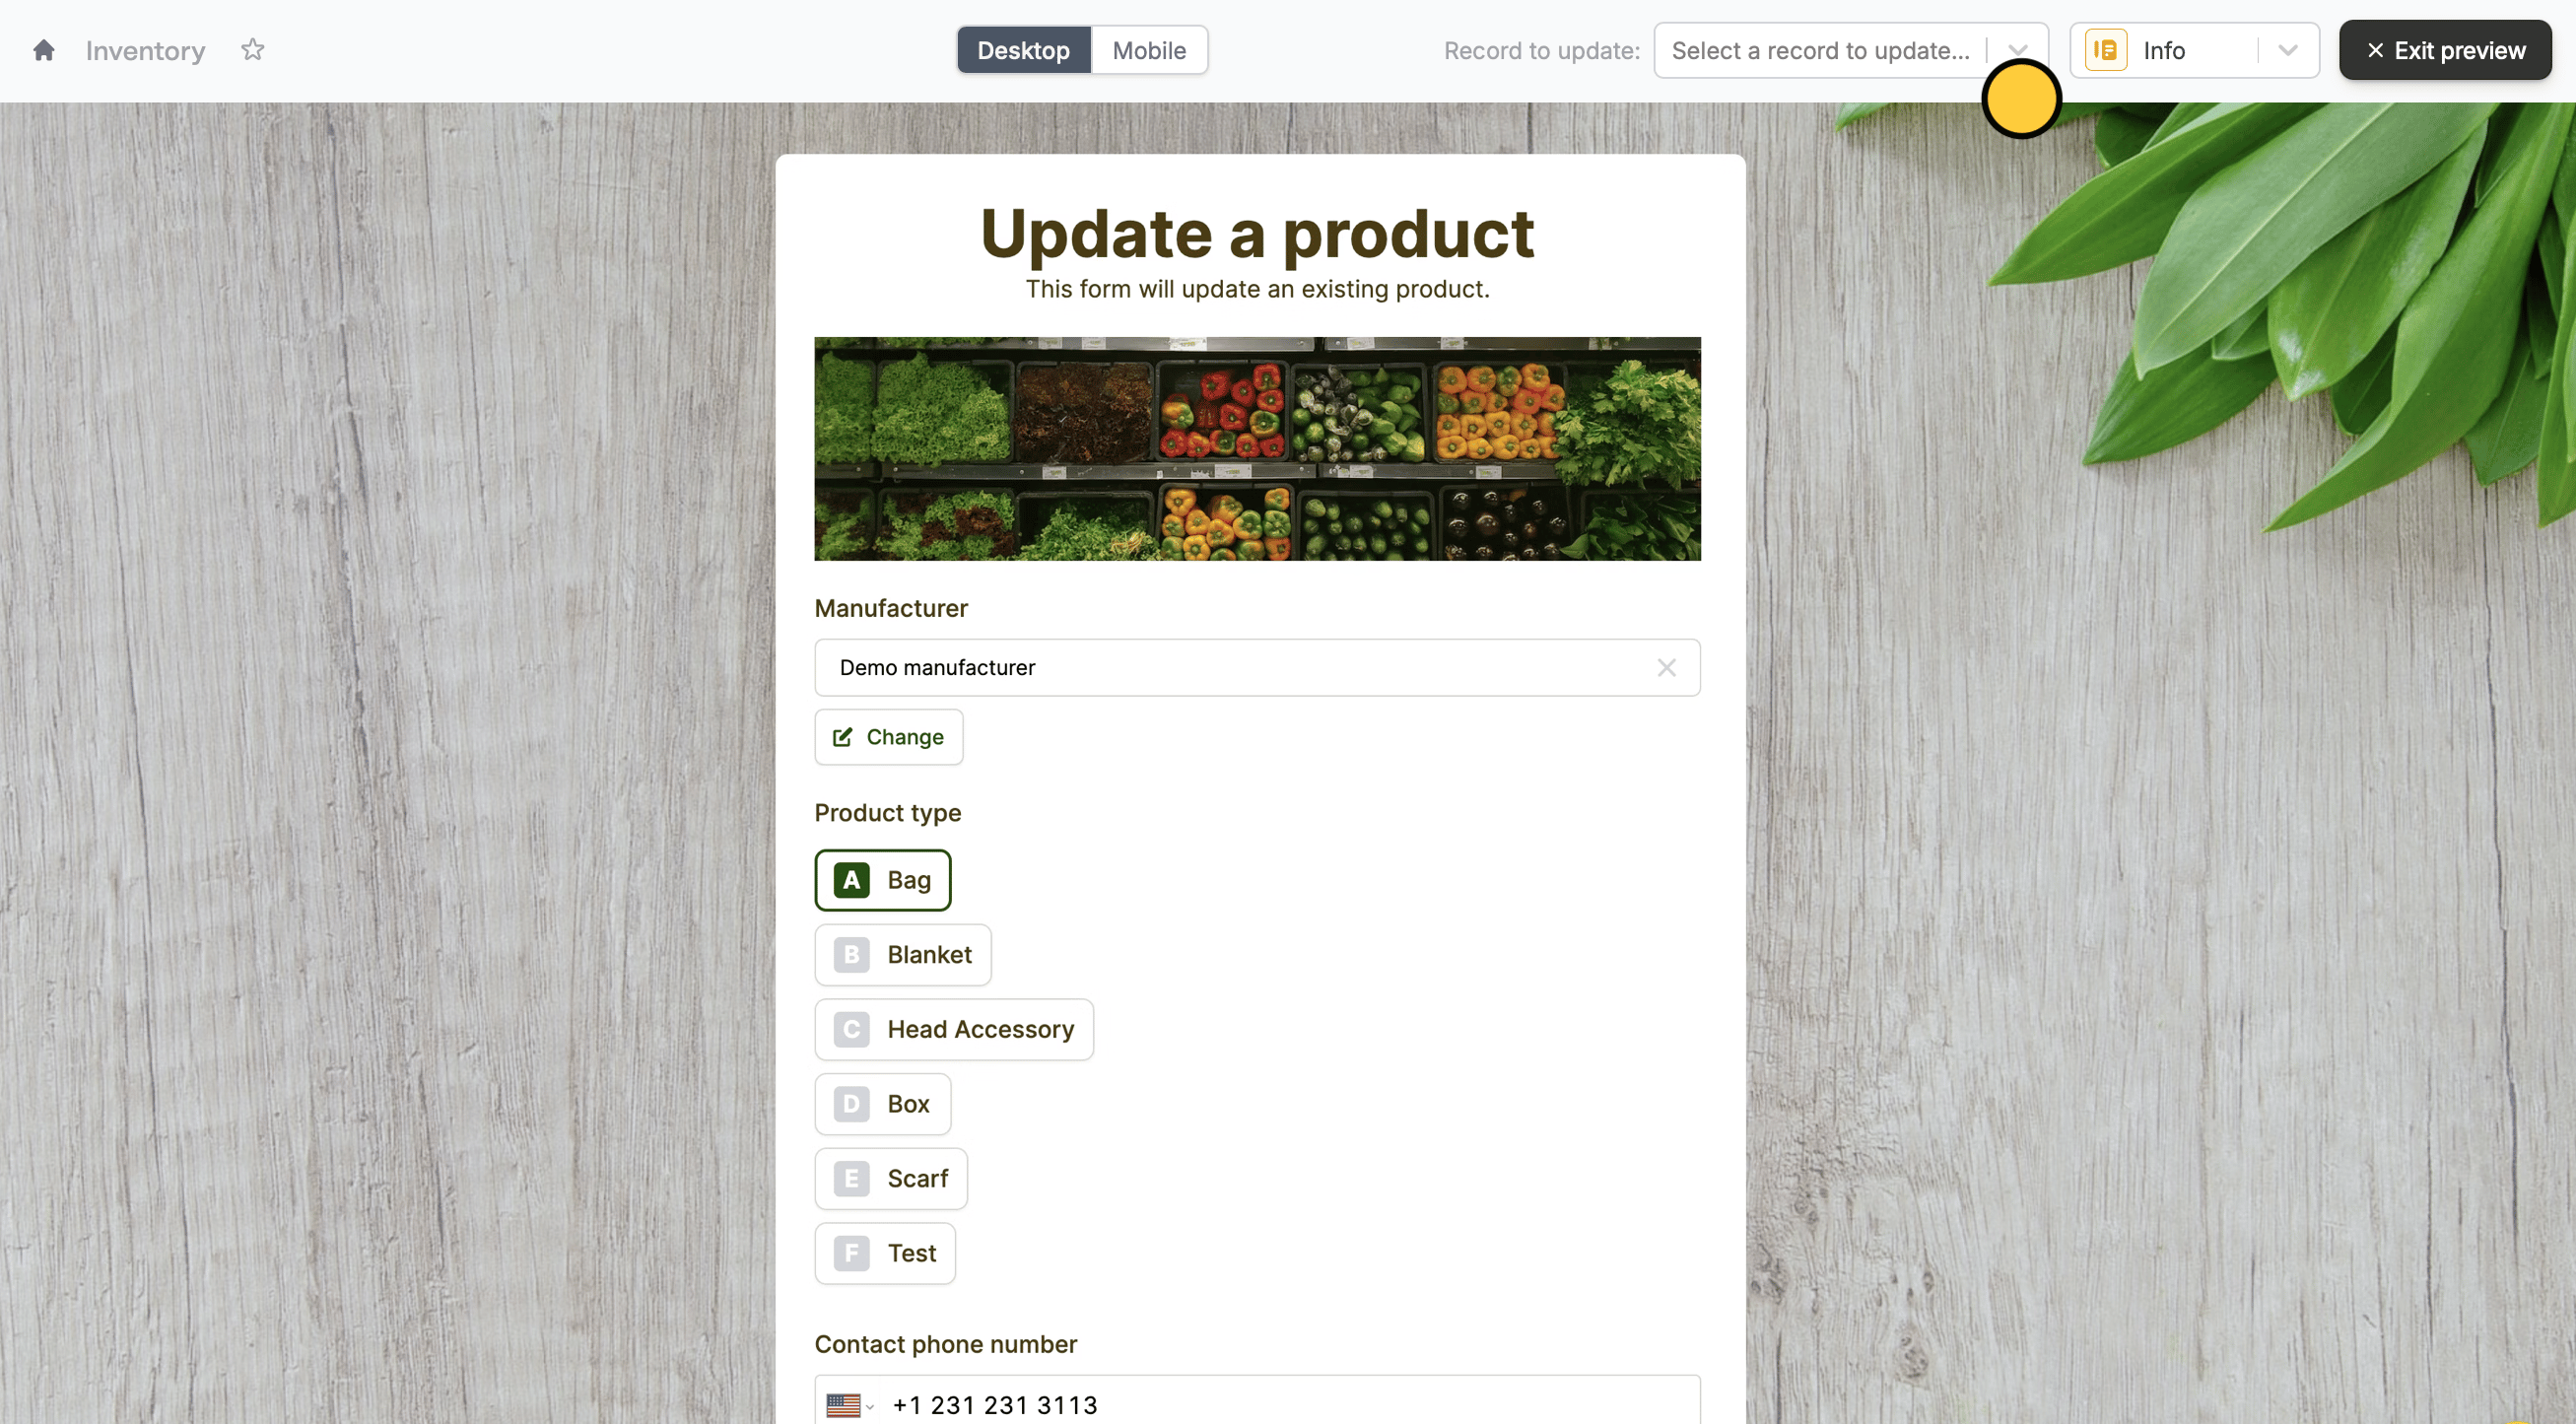 Your form is **automatically pre-filled** for whichever record it is updating.
 Then, we can display this button in an Airtable interface, for users to easily edit the record.
 ## Airtable specific guides